“The smell of good bread baking, like the sound of lightly flowing water,
— M. F. K. Fisher
is indescribable in its evocation of innocence and delight.”
Baking bread is simple, all you need is time, love and patience. As a beginner baker, every time you bake will be a learning experience; I always have such experiences myself when baking bread. I promise you there will be no dull moment for you will learn something new every time. As you practice, you will experience the smell of baked bread, recognize when the dough is well kneaded, and when the bread is fully baked. So put fear aside and experience the joy of baking yeast bread.
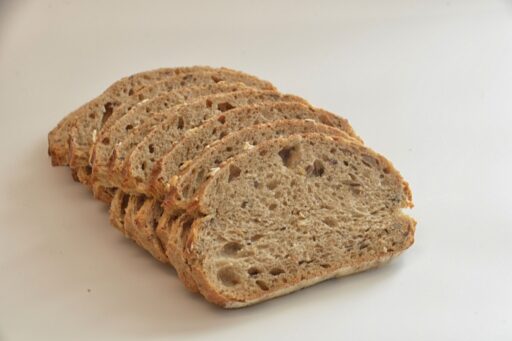
Here are tricks and tips that you will need to know as a beginner for perfect bread baking:
- Use good quality ingredients
- Make sure your yeast is fresh and active before using it.
- Use the right amount of yeast for the size of your loaf.
- Knead the dough well to develop the gluten.
- Let the dough rise in a warm, draft-free place.
- Preheat your oven before baking the bread.
- Use a sharp knife or razor blade to make slits on the top of the loaf before baking.
- Bake the bread at the right temperature for the right amount of time.
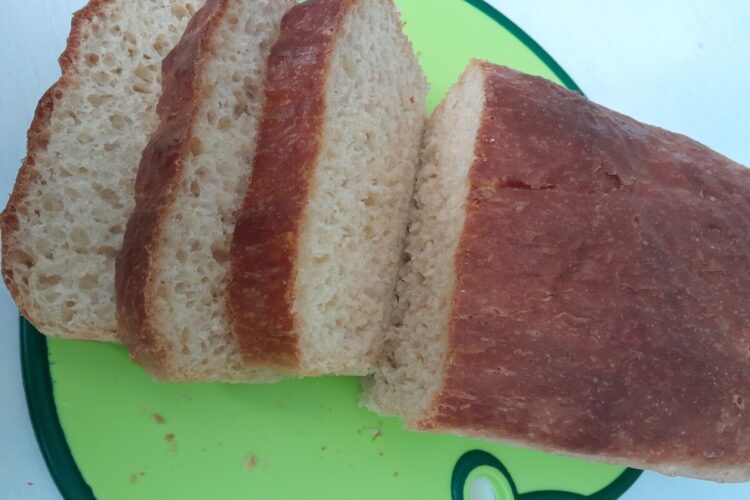
- Allow the bread to cool completely before slicing.
- Use a serrated knife for slicing the bread.
Use good quality ingredients
When it comes to ingredients, using good quality flour and yeast is essential for making delicious bread.
High quality flour
Using high-quality flour will give your bread a better texture and flavor. Look for flour that is unbleached as these types of flour have not been treated with chemicals that can affect the taste and texture of your bread. Also, consider using different types of flour like whole wheat, rye, spelt or other ancient grains. This can add a unique flavor to the bread, making it different and special.

Type of yeast
When selecting yeast, you have a few options: instant yeast, active dry yeast, and fresh yeast.
- Instant yeast is dry yeast (not wet) and is the most common type and can be added directly to the flour mixture. This is because it does not need to be dissolved in water before using.
- Active dry yeast is also a form of dry yeast (not wet). It must be dissolved in warm water before being added to the flour mixture. This is because active dry yeast is dormant in itself thus the need to proof in warm water first.
- Fresh yeast is not as common and can be found in specialty stores. Fresh yeast is made of fresh yeast cells. It is wet yeast that is compressed into small square cakes. These blocks of fresh yeast are comprised of 70 percent moisture, and therefore are quite perishable.
Keep in mind that the quality of the ingredients you use will have a direct impact on the quality of your bread. So, invest in good quality ingredients and you’ll be well on your way to making delicious homemade bread.
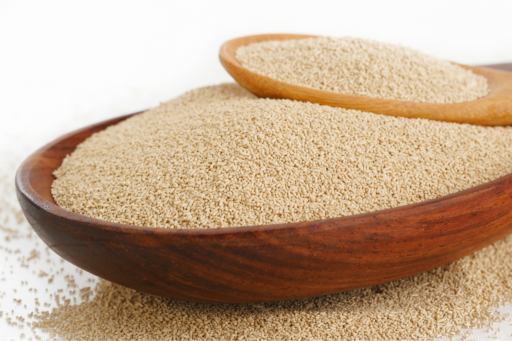
Make sure your yeast is fresh and active before using it
When using yeast to make bread, it’s important to make sure that it is fresh and active before using it. Yeast is a living organism that needs to be kept in the right conditions in order to be able to work properly.
If your yeast is not fresh or has been stored incorrectly, it may not be active and will not be able to leaven your bread. This can result in a dense, heavy loaf that doesn’t rise properly.
To test if your yeast is active, you can dissolve it in a small amount of warm water (around 110-115°F) with a pinch of sugar. Let it sit for 5-10 minutes. If the mixture becomes frothy and bubbly, your yeast is active and ready to use. If it doesn’t, it’s time to purchase new yeast.
Also, when storing yeast, make sure it is kept in an airtight container, in a cool and dry place, away from light and heat. Yeast can also be stored in the freezer to make it last longer.
Keep in mind that using fresh, active yeast is crucial for good bread-making results. And, if you have any doubts about the yeast activity, it’s best to test it before using it, to ensure that you’ll get a good loaf of bread.
Use the right amount of yeast for the size of your loaf
When it comes to using yeast in bread-making, it’s important to use the right amount of yeast for the size of your loaf. Yeast is responsible for making the dough rise and giving it that characteristic light and fluffy texture. However, too much or too little yeast can result in a loaf that doesn’t rise properly or has an off-flavor.
A general rule of thumb is to use about 1/4 teaspoon of instant yeast or 1/2 teaspoon of active dry yeast per cup of flour in a recipe. Keep in mind that this can vary depending on factors such as the temperature and humidity of your kitchen, the type of flour you’re using, and the size of your loaf.
Also, using too much yeast can make the bread taste sour or even burn the crust. So, make sure to follow the recipe and use the right amount of yeast for the size of your loaf.
Another thing to consider is the fermentation time, which is the time that the dough takes to rise. Yeast requires time to ferment, and the fermentation time depends on the temperature and humidity. Warmer temperatures and higher humidity will make the dough rise faster, so you can use less yeast. Colder temperatures and lower humidity will make the dough rise slower, so you may need to use more yeast.
In short, using the right amount of yeast is crucial for achieving the desired results in bread-making. It takes some practice and experience to know how much yeast to use, but with each bake, you’ll learn more about your dough and get better results.
Knead the dough well to develop the gluten
Kneading the dough is an essential step in bread-making, as it helps to develop the gluten. Gluten is a protein found in wheat flour that gives bread its structure and texture. When the dough is kneaded, the gluten molecules are stretched and tangled together, creating a network of gluten that gives the bread its elasticity and ability to rise.
The process of kneading can be done by hand or with a stand mixer. When kneading by hand, use a pushing and folding motion to stretch and fold the dough. When kneading with a stand mixer, you can use a dough hook attachment. The kneading process typically takes anywhere from 5 to 15 minutes, depending on the recipe and the method used.
It’s important to knead the dough until it becomes smooth and elastic. One way to test if the dough is ready is to do the “windowpane test.” This is where you take a small piece of dough, stretch it out between your fingers, and if the dough stretches out into a thin, translucent sheet without breaking, the gluten is fully developed.
Keep in mind that kneading the dough well is essential for developing the gluten, which in turn is essential for creating a light, airy, and delicious loaf of bread. Skipping or not kneading enough can result in a dense, heavy loaf that doesn’t rise properly.

Let the dough rise in a warm place
After the dough has been kneaded, it needs to rise, also known as fermentation or proofing. Fermentation is the process where the yeast ferments the sugars in the dough, producing carbon dioxide and alcohol, which makes the dough rise and gives the bread its characteristic flavor and aroma. The dough will need to rise in a greased bowl to prevent it from sticking on the sides of the bowl. Cover the dough with a clean kitchen towel or plastic wrap to prevent it from drying out and to keep it warm.
To let the dough rise, place it in a warm, draft-free place. The ideal temperature for rising dough is around 75-80°F, but it can vary depending on the recipe and the type of yeast used. Warmer temperatures will make the dough rise faster, while cooler temperatures will make it rise slower. The rising time can vary depending on the recipe, but it typically takes anywhere from 30 minutes to 2 hours.
It’s important to keep the dough protected from drafts, as sudden changes in temperature can affect the fermentation process. A draft-free place will help the dough to rise evenly and consistently. Keep in mind that letting the dough rise in a warm, draft-free place is crucial for achieving the desired results in bread-making. It takes time for the dough to rise and ferment, but the end result is a light, airy, and delicious loaf of bread. Skipping or not letting the dough rise properly can result in a dense, heavy loaf that doesn’t rise properly.
Preheat your oven before baking the bread
Preheating the oven is an important step in bread-making, as it ensures that the bread is baked at the right temperature for the right amount of time. It’s important to preheat the oven before baking the bread so that the dough can start baking immediately and rise properly.
The ideal baking temperature for bread can vary depending on the recipe, but it typically ranges from 350-450°F. Some breads, like sourdough, require a lower temperature and a longer baking time, while others, like focaccia, require a higher temperature and a shorter baking time.
It’s important to preheat the oven for at least 20-30 minutes before baking the bread to ensure that it reaches the desired temperature. This will help the bread to rise and cook evenly.
Also, baking bread in a preheated oven ensures that the bread will have a nice crust and crumb. The heat from the oven will make the dough rise, and the surface will become golden and crusty.
Keep in mind that preheating the oven before baking bread is crucial for achieving the desired results in bread-making. Skipping this step or not preheating the oven long enough can result in a loaf that doesn’t rise properly or has an uneven crust.
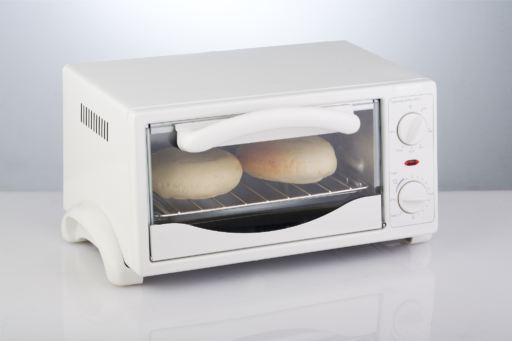
Use a sharp knife or razor blade to make slits on the top of the loaf before baking
Making slits on the top of the loaf before baking, also known as scoring, is an important step in bread-making. Scoring the dough allows the bread to expand during baking, and it also gives the bread a nice appearance.
When scoring the dough, it’s important to use a sharp knife or razor blade to make clean, precise cuts. The depth of the cuts will depend on the recipe and the type of bread you’re making. For example, a baguette typically has deeper and longer slits than a boule.
Scoring the dough also allows the bread to expand during baking. As the dough rises in the oven, the gluten structure expands and pushes the surface of the dough. Scoring helps to control the direction of expansion, preventing the bread from splitting in unwanted areas.
Keep in mind that scoring the dough before baking is crucial for achieving the desired results in bread-making. Skipping this step or not scoring the dough properly can result in a loaf that doesn’t rise properly or has an uneven crust.

Bake the bread at the right temperature for the right amount of time
Baking the bread at the right temperature and for the right amount of time is crucial for achieving the desired results in bread-making. The temperature and baking time can vary depending on the recipe and the type of bread you’re making.
For example, a loaf of white bread typically bakes at a temperature of 350-375°F for 25-35 minutes, while a sourdough loaf may bake at a lower temperature of 425-450°F for longer, around 45-60 minutes.
The ideal baking time and temperature can vary depending on the recipe and the type of bread you’re making. It’s important to follow the recipe and check the bread frequently while it’s baking.
It’s also important to check the internal temperature of the bread using a meat thermometer, which should be around 190-200°F for most breads. The internal temperature is a better indicator of doneness than the baking time.
Keep in mind that baking the bread at the right temperature and for the right amount of time is crucial for achieving the desired results in bread-making. Under or over baking the bread can result in a loaf that is either under cooked or burnt.
Allow the bread to cool completely before slicing
Allowing the bread to cool completely before slicing is an important step in bread-making. When bread is removed from the oven, it continues to cook and cool, and slicing it while it’s still warm can cause the bread to be gummy or moist.
Cooling the bread allows the steam inside the bread to escape and the crumb to set. This makes slicing the bread much easier and it will also help prevent the bread from falling apart.
It’s important to let the bread cool completely, typically for about an hour, before slicing into it. The bread can be placed on a wire rack to cool and this will allow for air to circulate around the bread, preventing it from becoming soggy.
Also, when the bread is cooled, the flavor and texture of the bread will be at its best. The bread will be more flavorful and the texture will be more consistent. Keep in mind that allowing the bread to cool completely before slicing is crucial for achieving the desired results in bread-making. Slicing the bread while it’s still warm can result in a loaf that is gummy or moist, and it can also make slicing difficult.
Use a serrated knife for slicing the bread
Using a serrated knife for slicing bread is an important step in bread-making. A serrated knife has a saw-like edge that is designed to grip the bread and make clean, precise cuts without squishing or crushing the bread.
The serrated edge allows the knife to cut through the crust without compressing the soft interior of the bread, which can result in a less-than-perfect loaf.
When slicing bread with a serrated knife, it’s important to use a gentle sawing motion. Hold the bread steady with one hand and use the other hand to guide the knife through the bread.
Also, to preserve the freshness of the bread, it’s recommended to only slice the bread as you need it. This will help to prevent the bread from becoming dry or stale.
Keep in mind that using a serrated knife for slicing bread is crucial for achieving the desired results in bread-making. A serrated knife will make clean, precise cuts without squishing or crushing the bread, which will help to preserve the freshness and the appearance of the bread.

To conclude, keep in mind that baking bread is an art and takes practice. It’s normal for your first loaves not to be perfect, but with each bake, you’ll learn more about the dough and get better results.

